The billing system is simple to set up, but is designed to be very flexible and powerful. There are a lot of separate settings which enable you to set up billing in different ways to suit how you want to run your business. Turn on billing at Admin > Billing.
You can accept card payments, giving your customers a quick and easy way to pay or handle this manually. Either way the system can still automate your bookkeeping.
If you want to accept card payments, you can connect your own Stripe account. Stripe handle the card payments and deposit the money into your school bank account. As part of the billing system setup, you will be guided through setting up your own Stripe account and linking it to Flight School Booking.
About Stripe
Stripe is a platform for online payments, founded in 2010. The company charges a low fee per transaction (1.4% + £0.20 in UK) and pays the balance direct to bank accounts. Stripe is now one of the most highly valued startups in the world at roughly $35 billion (September 2019). The company is now in 40 countries covering 70% of the world economy and process hundreds of billions of dollars each year.
Turning on Billing
Get started by navigating to Admin > Billing.
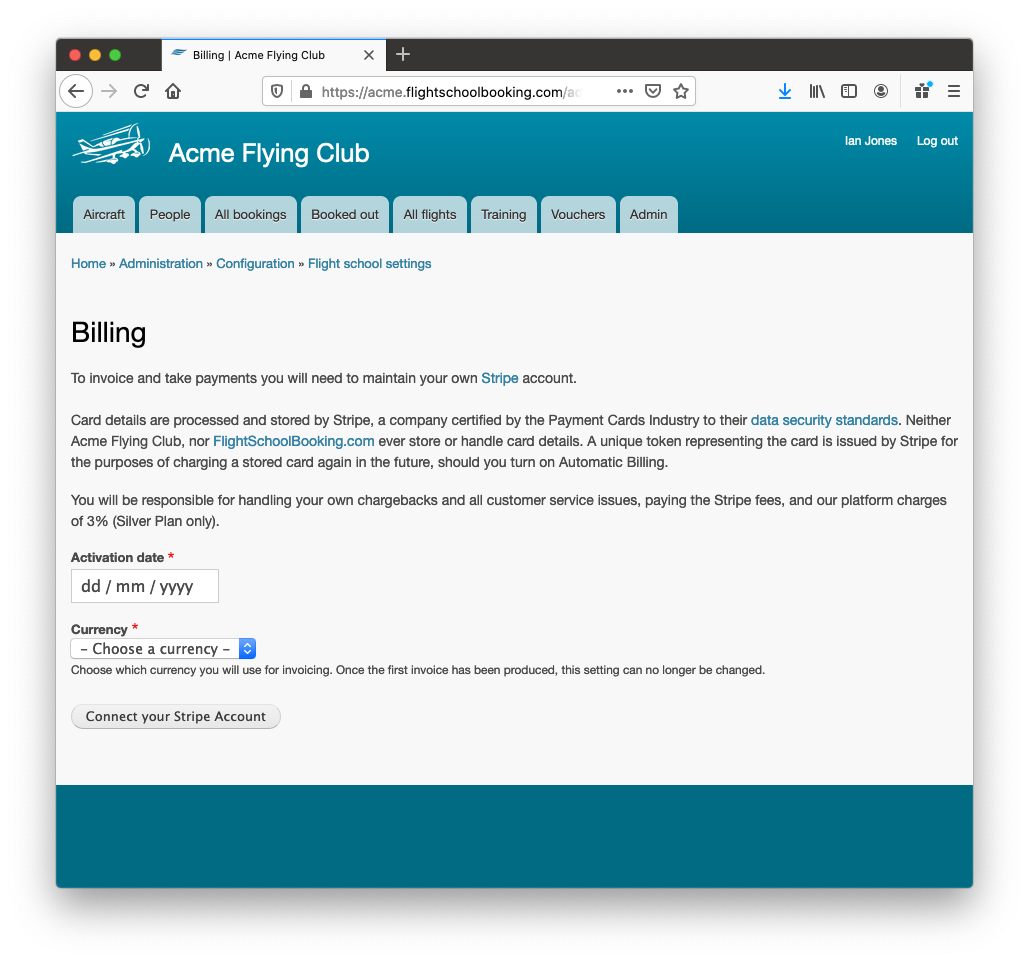
Activation date
Choose a date from which you want the system to start generating invoices. This is usually either today's date or a date in the future. If an old flight is edited and saved, it will not generate an invoice if the date is before the Activation date.
Currency
This is the currency you want to use for all your invoicing. Be careful to select the correct currency because once the first invoice has been generated, it cannot be changed.
Once you click Connect your Stripe Account, you will be taken to Stripe's website. If you already have a Stripe account, sign in and give Flight School Booking access to request payments on your behalf. Otherwise, activate your own Stripe account by filling in details about your business and the bank details you would like your payments deposited in.
Once everything has been completed, you should be returned to your booking system and should see confirmation on the Stripe tab of which account you are linked with, and whether payments are enabled.
Note: Only the school owner (or other users with the owner role) can connect and disconnect from Stripe. This is a security measure which ensures only you can set up which bank account your payments will be sent to, while allowing office staff access to set up preferences, taxes, your price groups, invoice template and notification emails.
Once Stripe is connected, you should see the additional tabs:

- Preferences. General billing preferences such as the number of days credit to offer on invoices, whether to offer to remember customer card details for future billing and tax rates.
- Price groups. A standard price group is created automatically as a guide for setting your own prices. You can edit these fall-back prices and add your own price groups.
- Invoice template. This tab allows you to customise the way your invoices look, including your address and logo. You can also set the next invoice number the system should use, which can be useful if you are moving from another system.
- Notifications. As well as email templates for new invoices, payments received or failed, you can define a custom sender and/or have all billing emails blind-copied to another email address.